

Tips for Fixing That Sagging, Detached Roof Liner in Your Car
The majority of drivers put a lot of effort into maintaining their vehicle under the hood, around the wheels, and along the body; but over time, the interior of a vehicle can suffer gradual wear and tear too. Because it’s often ignored until it’s too late, cosmetic repairs to a car’s cabin can be a real pain.
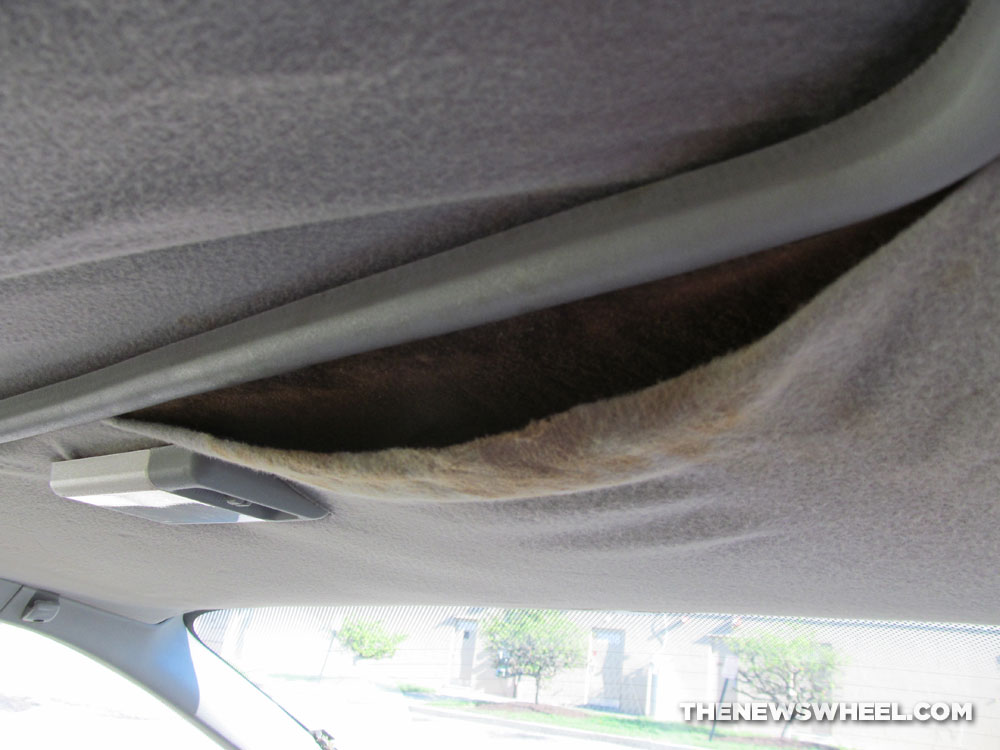
One area that can become an unsightly nuisance is the roof liner — the fabric that stretches across the ceiling. With age, moisture, heat, and wear, that fabric can come loose from the foam base and sag. Such damage is especially likely if your vehicle has a sunroof where moisture can leak in.
If this is happening to your car, here are some ideas for fixing that sagging roof liner.
Need to Clean Up Your Car’s Interior? Here are some tips from car care experts
Car liner repair: Turning a saggy situation into a sticky solution
According to Click Mechanic, the simplest way to repair that detached fabric is to find a way to reattach it. If only small patches of the liner have peeled loose, this is the easiest solution. Fix these spots before they get worse.
The best method for evenly adhering the liner back on is a spray-on glue. Make sure you use a product that’s made for reattaching upholstery fabric, or at least is durable enough to withstand persistent temperature changes and moisture from the weather.
Other quick methods of reattaching the current liner fabric include staples, pins, and heavy-duty tape — but these aren’t good long-term solutions, especially if the foam padding underneath is deteriorating. Plus, using spots of glue can result in unsightly splotches in the fabric and long-term discoloration.
To fully and truly solve the problem, it’s going to take some extra effort or money.
Modernize Your Vehicle! Check out these affordable, contemporary tech upgrades
This is what a user on NICO Club suggests: Start by removing the fabric entirely from the ceiling and seeing what the condition underneath it is. This evaluation will help you determine if you can simply attach a brand-new fabric as is or if you need to remove the entire liner piece from the car (either to repair it or buy a replacement).
Here’s a quick summary of how to replace the headliner. If possible, remove the entire liner carefully one section at a time so it makes less of a mess — the fabric, foam layer, and everything underneath. Use a wire brush to remove what foam is left on the ceiling. Vacuum up any foam debris that fell on the seats.
Chuck the fabric in the trash and buy a light, airy fabric from a craft store and cut it to fit the ceiling shape, leaving an extra inch or two around the edges you can trim later. Use a suitable adhesive spray and gradually flatten the fabric across the base, spraying and pressing a bit at a time. Then, reinstall the liner in the car with the new cover on it. A foam underlayer isn’t really necessary.
If this looks like it will take too much work, take your car to a shop that does vehicle reupholstering and spend a couple of hundred dollars to get it done professionally.
Aaron is unashamed to be a native Clevelander and the proud driver of a Hyundai Veloster Turbo (which recently replaced his 1995 Saturn SC-2). He gleefully utilizes his background in theater, literature, and communication to dramatically recite his own articles to nearby youth. Mr. Widmar happily resides in Dayton, Ohio with his magnificent wife, Vicki, but is often on the road with her exploring new destinations. Aaron has high aspirations for his writing career but often gets distracted pondering the profound nature of the human condition and forgets what he was writing… See more articles by Aaron.